Friday, November 20, 2015

Packers burlap wreath

So forever ago I bought a wire wreath with the intention of making a burlap Packers wreath for football season. As it turns out, I had a harder time finding burlap locally than I thought I would. After a year, I finally decided to order online. I have finally started making my wreath after over a year of planning it.

I am not really go into a huge tutorial for this, mainly because I didn't think to actually focus on how I did it, while I was doing it. I will give you the general idea though. I actually started, and redid the wreath about 5 times before I found a system I liked and kept it up. I just weaved the burlap and fabric back and forth, you pull it through and make the loops however big or small you want them. I ended up using this tutorial as the general basis behind my wreath (pretty obviously it was only the general thought behind mine, but it is a good start).I alternated between burlap and Packers fabric. Once I was satisfied with the look/fullness I hot glued the loose ends down on the back side (this probably isn't necessary, but I wanted to make sure it wouldn't fall apart right away). My original plan had been to use only burlap on the wreath and then use the fabric to make bows and hot glue them. When I started making the wreath I changed my mind and just used one large fabric bow at the top.

Things you need:
2-3 rolls of burlap ribbon (I ended up using 2.5 rolls, they were 15 ft each)
Packers fabric (I don't really have an estimate on how much, since I used scraps that my sent that had been left over when she made Bret's bedding)
scissors
hot glue gun
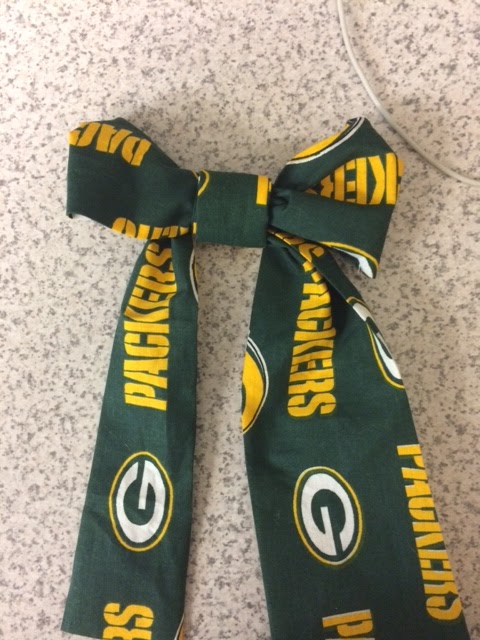
extra fabric or ribbon if you want a bow
Once I finally got the hang of it, and found a rhythm I liked, it only took about 30 minutes. I am very happy with it, and it has already replaced the wreath that has been sitting on the door since last Christmas.

Thursday, November 12, 2015

Thanksgiving Crafts


After a few days of no school, and some not nice weather, I am OVER sitting on the couch with the kids and watching movies. It was nice at first, since I have been stuffed up and achy, and even though the kids beg to just watch movies, they get bored quickly and start purposefully bugging each other until one finally snaps (thank you so much week with only one full day of school). Today I decided to break the cycle. Instead of settling back in the couch for another movie marathon after naps, we were going to get up and do something. Enter Thanksgiving crafting; Thanksgiving is only a few weeks away, and usually by now I have already had the kids make hand print turkeys, color Thanksgiving coloring pages, make thankful wreaths, and more. I have been slacking this year. So, armed with some sweaters and a cup of tea it was time to go in search of some nice leaves to make some turkeys.

Leaf Turkeys:
assortment of colorful leaves
white paper
glue
markers (or crayons)
red, yellow, orange, and brown crayon, marker, or construction paper (if you want to cut bodies instead of drawing them)

Collect your leaves. Glue them on white paper to look like turkey feathers. Either cut out gobbler, feet, and body, or draw them directly onto the white paper. You can use googly eyes if you have some on hand, if not (as was the case for us) you can just draw them on.

Thankful Turkeys:
colored paper (reds, yellows, browns, and oranges)
pen or marker
toilet paper roll
glue

Cut colored paper into feather shapes. Write something you (or your child) are thankful for on each feather. Glue the feathers onto the toilet paper roll, draw a face onto the toilet paper roll.

Saturday, November 7, 2015

Free Photoshop/PSE actions

I have been so busy that I haven't posted in almost a month!! WHAT?!? I feel like I have committed some sort of crime, so here I am (even though I should be making dinner at the current moment). Dinner can wait half an hour, right?!? Of course it can!
Today I want to share some awesome free photoshop actions that I have found while doing some photo editing. I have been fairly obsessed with having "photo shoots" with the kids lately, and then spending hours upon hours editing to make some awesome images. (If you are my facebook friend and tired of seeing photos of the kids, sorry not sorry, and I won't be stopping any time soon.)

I found some on deviant art, but I found most from there either didn't work at all in Elements or were uneditable in Elements (which kinda sucks, but oh well), so I am not going to focus on those ones right now (I did find 1 or 2 that I liked even though I wasn't really able to personalize them the way I would like).

The first ones I would like to share are from OhSoPosh. If you head on over her to website she has a few free actions to download. I will show some of my favorites.
This is the original photo (well, not quite, I did sharpen the eyes). My favorite way to sharpen eyes is to duplicate the layer, lasso the eye, then click on adjust sharpness (adjust levels to your liking). For this particular photo the pixels is set to 96% and the radius is set to 3.0. It's a cute photo on it's own, but I wanted an extra touch.
This is the same photo with the OSP Belle Air action. It just adds something to do it don't you think?
OSP Cleopatra action.
OSP Day Dream action.
OSP Fresh Wonder Action.
OSP Love Couture action.
OSP Little Miss Muffet action with Opacity set to 1%.

This is not all of the free actions, but gives you a good idea. I am in LOVE!!! I would also head on over to TheCoffeeShopBlog. The have way too many free actions for photoshop to even attempt to show you them!! Seriously, go on over there and click on the Free Stuff tab. You will find free downloads for photoshop/PSE actions, Lightroom Presets, storyboards and more!! I mean, really SOO many!! I downloaded at least 10 free actions, with at least 20 more on the list. After I make dinner I plan on testing them out on some old photos.

Have fun editing!!